XCode Setup and Usage
Installation
XCode is Apple's free IDE for development on Mac OS X computers. If your computer did not come with the developer tools pre-installed, you can download them from Apple.
You will need to install the developer tools in order to compile code, but afterward you do not have to use XCode itself for editing or compiling your code. The build process is also supported through Makefiles, and as such is completely available through a command line interface via either make or xcodebuild. Follow the linux-style build directions on the downloads and execution pages if you want to develop without using the XCode IDE.
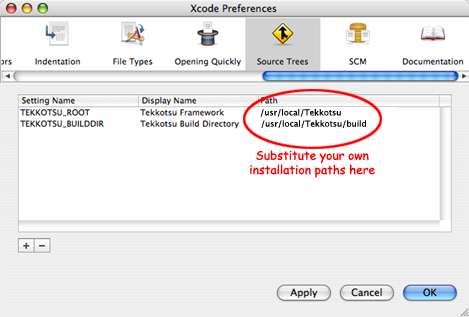
Additionally, you will need to install two libraries: libpng and libjpeg. The easiest way to do this is to use our combo installer (below), but you can also build them yourself from source. You can also install these via MacPorts or Fink.
|
combo installer | |
|
libjpeg installer |
libpng installer |
|
All packages contain universal binaries for both i386 (aka Intel) and PowerPC architectures. | |
Finally, you will need Java 5.0 or better, which you can check for the latest version at Apple's Java Download page.
Setup
Template Files
You may already know that there is a project/templates directory which holds template files for a variety of commonly inherited classes. We provide a script which will copy and modify these template files for use within XCode. To run the script, navigate to the project/templates directory in a console, and run ./installXCodeTemplates You will receive help text with other available options and an opportunity to cancel before anything is done.
Once you have installed the templates, you will see a "Tekkotsu" category in the "New file" selection box.
Simulation - Debugging
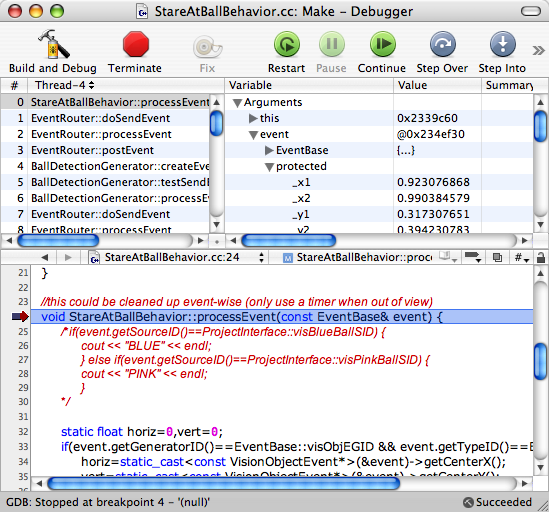
We will go through the same example of debugging the StareAtBallBehavior which we use on the main simulator page. In this example, we will find information about the first VisionObjectEvent which is sent to the behavior.
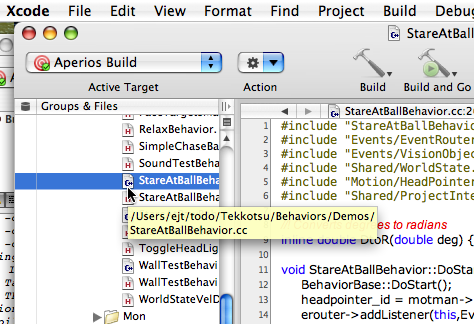
To begin, find the StareAtBallBehavior.cc within Tekkotsu Source/Behaviors/Demos:
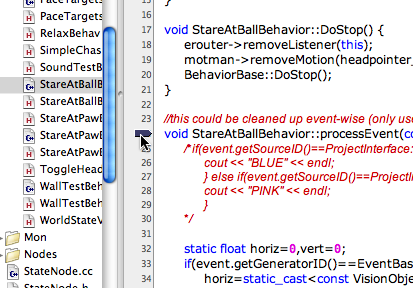
Set a breakpoint at the processEvent function by clicking on the line number before the function:
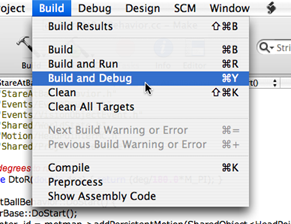
Choose "Build and Debug" from the "Build" menu to launch the debugger:
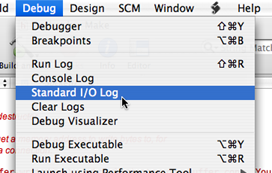
To enter commands on the simulator prompt, open the "Standard I/O Log" from the "Debug" menu. You may need to load some images for the simulator to process (set Vision.Source=...) or to change the simulator's Speed setting (set Speed=1 or run) to allow the simulation to proceed. The main simulation page has more details on these and other commands.
Once the simulator has started processing images, as soon as one with a pink ball is loaded, the debugger should cut in and you will be able to view information about variables in memory.
