Camera Calibration
Defining Color Segmentation Thresholds
Tekkotsu relies on color coding to recognize and track objects in the environment. This method is fast, and can be robust once it has been configured for the lighting conditions and colors that will be used.
Although we release a basic configuration with our software, this is configured for our lab and our tasks. If you have bright fluorescent lights, and can find similarly colored objects to ours (such as the Aibo's standard pink ball), this may work just fine for you. Use the Seg Cam button in the ControllerGUI to test how well the segmentation is working.
Otherwise, you will probably need to design a new set of color thresholds using sample images from the Aibo itself.
External Resources
Shawn Turner at SUNY Albany has also written a tutorial which may be of interest: Implementing Segmented Vision using Tekkotsu (local: PDF) This tutorial was written regarding an older version of the segmentation tool (then known as "VisionTrain"), but the later sections on modifying the vision system are still relevent and not covered here.
There is also a color segmentation chapter in the online Tekkotsu tutorial with additional background on color segmentation.
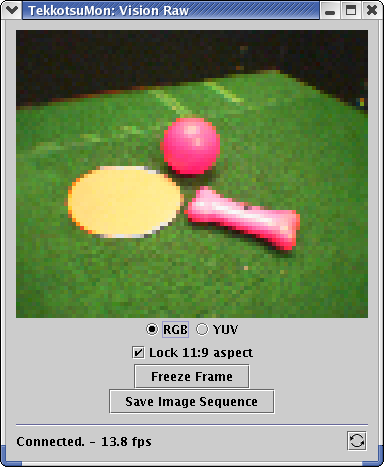
Set Camera Gain and Shutter Speed
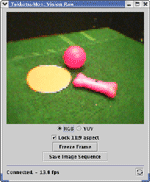 Launch
the Controller and bring
up the Raw Cam.
Launch
the Controller and bring
up the Raw Cam.
If you have trouble with this step, take a look at the TekkotsuMon Tutorial.- If the image appears too dark or too bright, you'll need to
adjust the shutter speed and/or gain. Use the following commands
in the Controller text input field (or on the console):
!set vision.shutter_speed=[fast | mid | slow]A low shutter speed will brighten the image, but cause more motion blur
!set vision.gain=[high | mid | low]
A high gain will brighten the image, but cause more graininess/noise
- Once you've found the proper gain and shutter speed, you should probably make those changes permanent by editing the <project>/ms/config/tekkotsu.cfg file.
Take Sample Images
We provide some sample images with the the segmentation tool. If you wish to skip this step, you may postpone taking your own images and use tools/easytrain/test*.png in the next section instead.
- The following commands in the ControllerGUI input box will
give you a good configuration for taking sample images. In
particular, these commands switch to a high-resolution, no
compression, low framerate format, which is good for taking
a number of high quality sample images. Normally the camera
runs in a relatively low-resolution, high framerate mode.
!set vision.rawcam_interval=1000After entering these commands, you will need to close and reopen the Raw Cam (if it was already running) so that it will reconnect with TCP (instead of the default UDP).
!set vision.rawcam_transport=tcp
!set vision.rawcam_y_skip=1
!set vision.rawcam_uv_skip=1
!set vision.rawcam_compression=none
- In the Raw Cam, switch to YUV mode.
YUV mode is the native format of the camera. Using this format will ensure accurate color. However, if you have RGB images, you'll still be able to use them later on.
- For each object you want to recognize, you need to take
several samples:
- Hold it in front of the camera
- Press the "Freeze Frame" button
- Click the "Save Image" button
- Press the "Unfreeze" to see the next item
- You could save an image sequence of the object being moved in front of the camera, but don't over do it or you will have too many images to deal with later. (The 'interval' setting above should help prevent this from being a problem by limiting the frame rate.)
- Save the images in PNG format. This will provide lossless storage. JPEG compression will smooth noise, which provides better segmentation in the test images, but will be unrealistic.
- However, if you do use JPEG, switch to RGB mode - JPEG uses YUV internally, so if you save in VisionGUI's YUV mode, you actually wind up converting color spaces.
- Take a sample image(s) of the background as well. (taking the pictures on a black (or any solid color) background will also simplify things later)
Load Images into EasyTrain
- In the <Tekkotsu>/tool/easytrain directory, run the following command:
java EasyTrain -isYUV <image_files>
If you saved the images as RGB (not recommended unless using JPEG) then pass -isRGB instead of -isYUV.
If you wish to use the provided sample images, pass test*.png for the files parameter.
If you get an Out of Memory error either delete some files or try increasing Java's max memory size (try passing it the -X option for more info) - Five windows should come up:
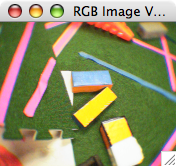
RGB Image View: displays the current image file in RGB color space.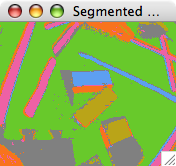
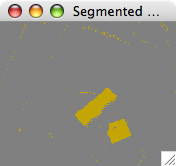
Segmented Viewer: displays the color-segmented version of the current image file. (Initially, it will be solid grey. This figure shows the window after colors have been defined.)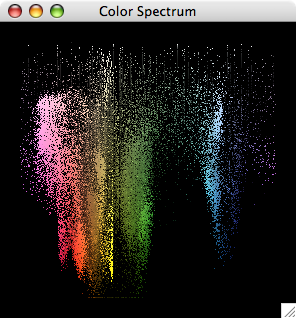
Color Spectrum Window: displays pixels from selected image regions in a 2D color space representation. Draw a bounding region with the mouse to select pixel clusters for segmentation.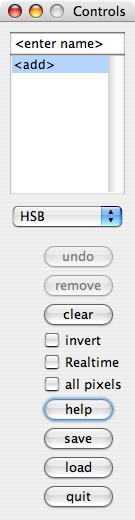
Control window: contains buttons to add or remove colors, load or save files, etc. Hover over items for tooltips.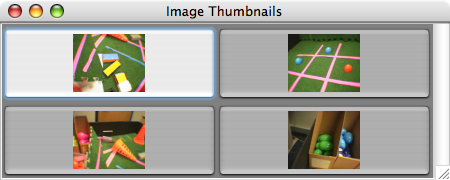
Thumbnail window: shows thumbnails of loaded images, allows you to directly jump to specific images by clicking on them. - Decide which color/object you want to segment first. Enter the name in the Controls window and hit 'enter'. This should add a new entry in the list with the specified name.
The colors selected for earlier regions will override those selected for later regions, so you should do the segmentation for "important" things first, so that the leftovers go to the less important colors/objects. - Select a region of colors in the spectrum window. Notice that the segmentation window is updated to show those areas of the image which map into that region of color space.
A yellow region of HSB colorspace selected (left), with corresponding segmented view (bottom right) and original RGB image for reference (top right). Windows are small for readability -- in practice you would want to resize the windows for better visibility.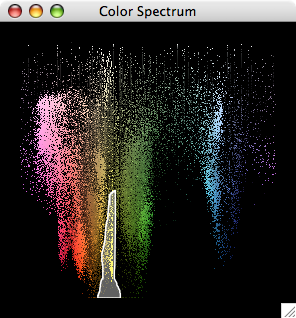
- If you draw another region in the spectrum, it will replace the previous one.
- If you wish to 'add' to the selection, hold down the shift key before you begin a selection, and the new selection will be unioned with the previous selection.
- If you wish to 'remove' from the current selection, hold down the control key.
- Use the arrow keys or the thumbnail window to view the results of segmentation on other images you have loaded.
- Repeat previous two steps to define the colors/objects which interest you.
- Click the 'save' button in the Control window to generate the .tm (threshold map) and .col (color definition) files, and save selectioned areas. The .tm and .col files will be going to the Aibo's memory stick, so choose a name with 8 or fewer characters so you won't have to rename the files to fit on the memory stick filesystem.
- If you later wish to re-edit the thresholds you have defined, you can load the .spec file, which stores the selections you made in the spectrum window. (The .tm and .col are deriviatives of this information, and do not store enough information to reconstitute the original selections.)
- To load the threshold files on the Aibo, see the section "Loading Threshold Files" below.
Segmentation Hints and Tips
- Moving the mouse within the RGB window will display a corresponding "hint" in the Spectrum window to indicate the position of the color the mouse is currently over.
- Selecting a region in the RGB window will show only those pixels in the Spectrum window. (Unless "all pixels" is selected, in which case RGB window selections are ignored.)
- You can undo with Ctrl-Z, redo with Ctrl-Shift-Z.
- Ctrl-A will select all, Ctrl-D to de-select all (clear selection).
- You can resize windows with '+' and '-' to zoom by integer multiples, or '=' to reset to "native" resolution.
- You can use arrow keys in any of the image windows to move between images.
- During runtime, noise removal is done during the run length encoding stage of processing. This will drop small areas of noise, but is responsible for the horizontal banding you will find in highly noisy areas.
- Shadows and hilights are hard to segment. Colors near pure white or black are out of bounds to avoid false positives. (With some further development, these could be mapped to their own colors, but currently they are special cases.)
- There are a number of color spaces available in the Control window. Each has some advantages and disadvantages, and might be better for different operations. However, only one space can be used at a time, and selections cannot be translated between them.
- Use the 'help' button to bring up a condensed version of these notes
Post-Processing: Merging Threshold Files
- java MoveIndex i j infile [outfile] -
remaps color i to j within infile.tm and infile.col, writes to outfile.tm and outfile.col if provided, otherwise
rewrites infile.
- java ThresholdMerge infile1.tm [infile2.tm ...] outfile.tm - Each threshold file is copied in turn into the output. Earlier thresholds override later thresholds. You will still need to merge the .col files manually
- java ThresholdAdd infile1.tm [infile2.tm ...] outfile.tm - Each threshold file is copied in turn into the output. Intersecting regions are set to 0. You will still need to merge the .col files manually.
Installing Threshold Files
- Once you have defined your segmentation thresholds, move your .tm and .col files into <project>/ms/config.
- Edit <project>/ms/config/tekkotsu.cfg so that the first thresh setting points to your .tm file, and the colors entry points to your .col file.
- Note that you can have multiple threshold (.tm) files, as long as they all agree on the color definitions (.col). You can access the results of segmenting with each of your threshold files via the channels of the SegmentedColorGenerator. The default detectors are set to use channel 0 (the first threshold file).
- You can change which threshold file is used by the SegCam via the vision.rlecam_channel setting (i.e. !set vision.rlecam_channel=X from within the Controller GUI)
- The default configuration settings define separate threshold files for ERS-2xx models vs. ERS-7 models, due to differences in how their cameras sense light. Be sure to edit the thresh values for your model (look for <ERS-*>...</ERS-*> tags)
- Most of the vision system's configuration is set up in <project>/StartupBehavior_SetupVision.cc. You can add new detectors (e.g. BallDetectionGenerator) following the example of what is provided in order to have events thrown when "significant" regions of the indicated colors are seen.